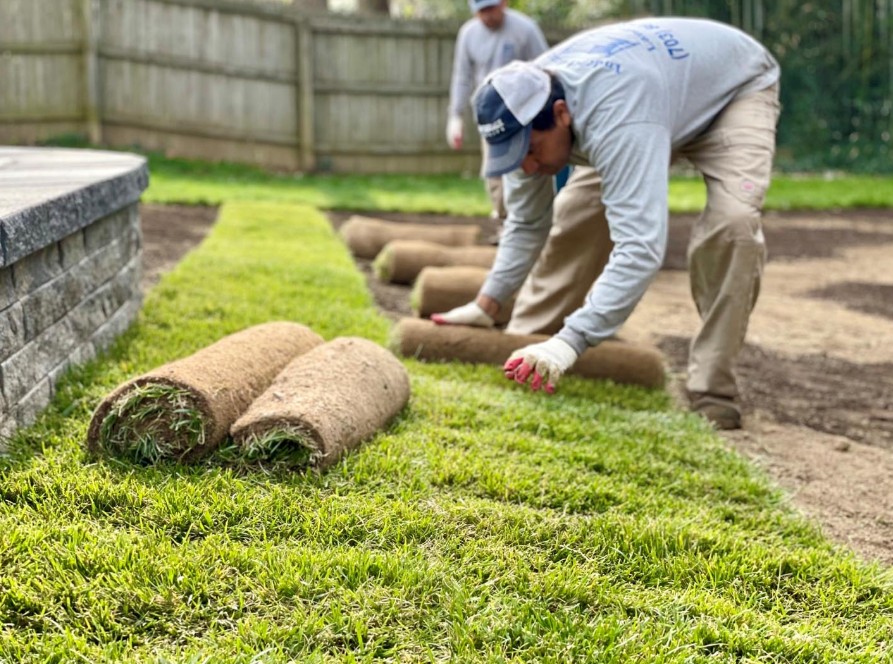
Installing Fresh Sod in Springfield, VA: Proper Guidelines
Springfield, VA, homeowners understand that a thick, green lawn is the result of careful planning and proper installation. Of course, fresh sod delivers immediate curb appeal. However, its long-term rooting and survival depend on how carefully it is installed. Neglecting even a single step can result in bare patches and uneven growth before the season ends.
Before purchasing sod, confirm with your supplier which grass type they grow. Premier Turf Farms grows a turf-type tall fescue mixed with Kentucky bluegrass, both cool-season grasses. This matters especially in a market where choosing the right grass type for your conditions is important, and the wrong choice for your conditions will struggle regardless of how well it is installed.
That said,let us now learn how to install fresh sod that meets your expectations.
How to Install Fresh Sod Properly
1. Prepare the Soil
Don’t rush this part. Remove all old grass, weeds, rocks, and roots from the area first. Then till the soil at least 4 to 6 inches deep.A rough, compacted base will prevent sod from establishing proper root contact.
Once the soil is tilled, grade the surface so water won’t pool in low spots. A soil test is worth doing before installation if you have not had one done recently. A basic test returns your soil’s pH and primary nutrient levels, which tells you whether lime, sulfur, or a starter fertilizer is needed before the grass sod in Springfield, VA, goes down. A properly prepared base reduces maintenance issues in the future.
When ordering, one pallet of sod typically covers 450 square feet,though this varies by supplier. Measure your area before calling so you order enough without significant waste.
2. Moisten the Soil
Before the first piece of sod touches the ground, water the soil. You want it damp throughout, not soaking wet. Muddy, waterlogged ground will slow rooting rather than accelerate it, so aim for moist and workable conditions.
This step matters more than most people realize.Dry soil draws moisture from fresh sod rolls before the roots have an opportunity to establish.
3. Lay the Sod Carefully
Start along a straight line, whether it is a driveway, sidewalk, or fence line. Also, be sure that each piece is pressed tightly against the last one with no gaps or overlapping edges.Gaps dry out quickly and create visible seams that may never fully close.
Do not stretch the pieces to make them fit. Sod shrinks slightly as it dries, and a stretched piece will develop gaps later. Work row by row and stagger the seams like a brick pattern. This offset layout keeps the surface from splitting along one continuous line and makes the finished lawn look more natural.
4. Roll the Newly Installed Lawn
After the sod is installed, roll the entire area with a lawn roller. The objective is to press the grass sod firmly against the soil and eliminate any air pockets beneath it. Air pockets are where roots stop growing, so this step is worth taking seriously.
For grass sod in Springfield, VA, proper soil contact from the outset promotes uniform rooting across the entire lawn.
When to Install Fresh Sod
For the cool-season tall fescue and Kentucky bluegrass mix grown by Premier Turf Farms, fall is the ideal installation period in Virginia, with spring also being a suitable window. Late summer to mid-fall provides favorable conditions for cool-season sod establishment, while sod can generally be installed whenever the soil is not frozen and irrigation is available.
Watering Fresh Sod After Installation
Keep the Sod Moist
Water the lawn immediately after the final piece is installed. This first watering needs to soak through the sod and into the soil beneath it. Lift a corner of the sod after watering to check the depth. If the moisture hasn’t reached the soil, water longer.
For the first week or two, plan on watering once or twice a day depending on heat and wind. The goal is to keep the sod consistently moist without saturating the soil. Once new roots begin anchoring into the soil, reduce watering frequency and water more deeply every few days instead. Most sod reaches this stage within two to three weeks. You can confirm it by tugging gently on a corner. If it resists lifting and pulls slightly at the soil beneath, the roots have taken hold, and you can begin tapering your schedule.
Morning irrigation works best.This is when less water evaporates, and the grass enters the heat of the day with sufficient moisture to withstand it.
First Mowing
Wait until the sod has rooted firmly before mowing. The tug test above is your cue. Set your mower to a height appropriate for your grass type, and never remove more than one-third of the blade height in a single pass. Cutting too low too soon stresses new roots before they are fully established.
Final Words
Properly installing grass sod in Springfield, VA, from the start is mostly about not cutting corners on the basics. Prepare the soil right, lay each piece tight, roll the surface, and water right away. Keep up with irrigation through the establishment period. As a result, the fresh sod will develop into a thick and durable lawn.